 Save
Save There’s something bold about the way the kitchen smells after the first few days of fermenting peppers—sharp, tangy, a little wild. You can almost hear the quiet fizz as the brine bubbles away. This hot sauce started as a bit of an experiment, just to see if I could coax more flavor out of some ordinary market chili peppers. The anticipation of opening that jar after a week, unsure whether I’d created something genius or just overly ambitious, made the process feel like a tiny adventure. Compared to store-bought, homemade fermented hot sauce is alive in a way you have to taste to believe.
Last summer, I made this for a family taco night, a little nervous about how spicy it might turn out. Everyone got so curious that we started with tiny spoonfuls on tortilla chips, making faces and comparing notes. Once the bravest among us went back for a second splash, the rest followed, and soon the bottle was half gone before dinner was finished. I learned that making hot sauce can turn a simple meal into a real event. Nobody left the table without asking for the recipe.
Ingredients
- Fresh red chili peppers: The core of the sauce, delivering heat and color—wear gloves when handling if you’re sensitive and try blending varieties for depth.
- Red bell pepper: Adds natural sweetness and helps mellow the fire, making the sauce more family-friendly.
- Garlic: Four cloves deepen the flavor, bringing earthy zing that surfaces with fermentation.
- Shallot or onion: A little hit of allium smooths the pepper’s bite, and a small shallot gives a gentle complexity.
- Carrot (optional): I like to add carrot for sweetness and a silken final texture, but it’s totally fine to leave out if you want a sharper edge.
- Filtered water: Using filtered water (never chlorinated tap) helps fermenting bacteria thrive, giving you reliably lively results.
- Non-iodized salt: The right salt keeps the veggies crisp and sets up a safe brine—use sea or kosher salt for best results.
- Apple cider or distilled white vinegar: Adds tang and preserves the finished sauce; choose apple cider for fruity notes, white vinegar for pure acidity.
Tired of Takeout? 🥡
Get 10 meals you can make faster than delivery arrives. Seriously.
One email. No spam. Unsubscribe anytime.
Instructions
- Make the Brine:
- Mix non-iodized salt into filtered water until completely dissolved – the grainy texture vanishes and the water clears.
- Chop and Prep:
- Roughly chop your peppers, bell pepper, carrot, garlic, and shallot or onion—it doesn’t have to be perfect, just small enough to fit nicely in the jar.
- Pack the Jar:
- Layer the vegetables into a super clean 1-liter jar, packing them down gently with clean hands so they settle together.
- Submerge and Weigh Down:
- Pour the brine over the mix until all the veggies are under liquid, then use a fermentation weight or a zipped bag of brine to stop any floaters escaping the surface.
- Cover and Ferment:
- Cover with a loose lid or an airlock to let gases escape; you might hear a faint hiss or see bubbles after a day or two.
- Daily Check:
- Stash the jar somewhere cool and dark for a full week—peek each day to skim off any surface scum, making sure everything stays underwater and happy.
- Blend It Up:
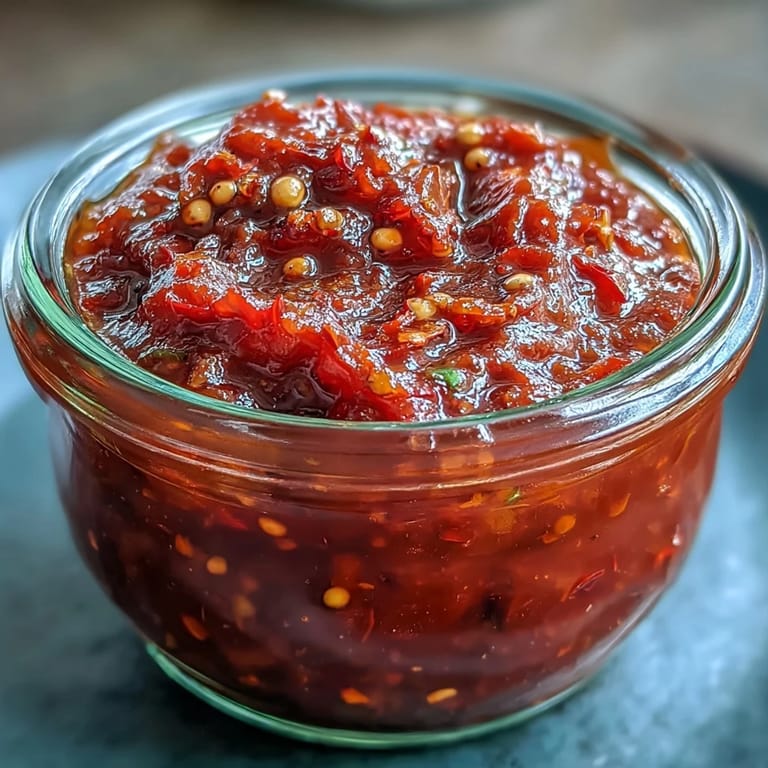
- After 7 days, tip all the contents (and brine) into a blender, add the vinegar, and blend until you’ve got a vibrant, smooth sauce; if it’s too thick, add a splash more brine or vinegar.
- Strain or Not:
- Strain through a fine-mesh sieve for a silky pour, or leave the texture rustic if you like something heartier.
- Bottle and Store:
- Funnel your sauce into a sterilized bottle or jar—don’t forget to admire the color—then refrigerate and use within three months.
 Save
Save 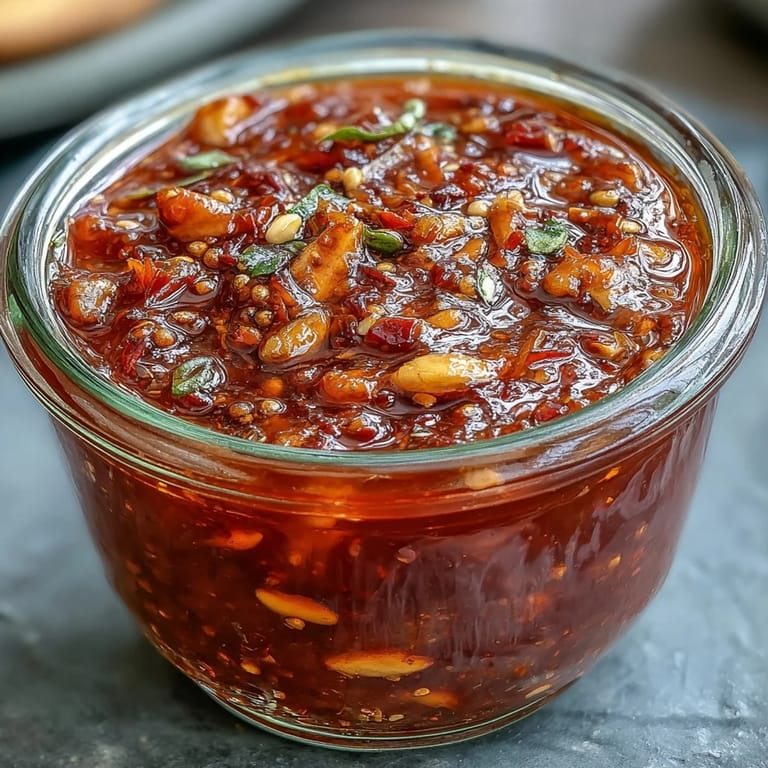 Save
Save I’ll never forget when a friend who swore she couldn’t handle spicy food poured this sauce on her eggs and asked for a bottle to take home. Somehow sharing something homemade (and a little unpredictable) made breakfast feel celebratory—part science, part tradition. It’s amazing how a spoonful of ferment could bridge so many tastes.
Choosing and Mixing Peppers
Don’t be afraid to experiment with combinations—sometimes I toss in a single habanero or use green and red chilies together for a wild spectrum of flavor. Sweeter bell peppers keep the heat manageable and let the tangy funk of fermentation shine. You can even salvage wrinkled peppers you forgot in the vegetable drawer, since flavor only intensifies. Fresh, but not perfect, works just fine.
Easy Ways to Adjust the Heat
If you want fire, sneak a few Thai chilies into the mix. If you’re serving a spice-averse crew, lean on bell peppers and carrots for a gentler approach. When in doubt, blend and taste before adding more brine or vinegar—you can always kick up the heat with more chili, but you can’t take it away.
Fermentation Confidence and Troubleshooting
The first time the jar bubbled and released its unmistakable tang, I worried I’d done something wrong, but that lively smell is the sign it’s working. Relax—if you keep things submerged and only a little harmless white film forms (not pink or fuzzy), just skim it off. Trust your nose, and don’t overthink the process—the difference between an okay and a spectacular sauce is usually patience.
- Label your bottle with the date so you remember how long it’s been fermenting.
- If you like more tang, just add a little extra vinegar at the end.
- Give the jar a gentle tilt daily to keep things moving and stop “dead” spots from forming.
 Save
Save 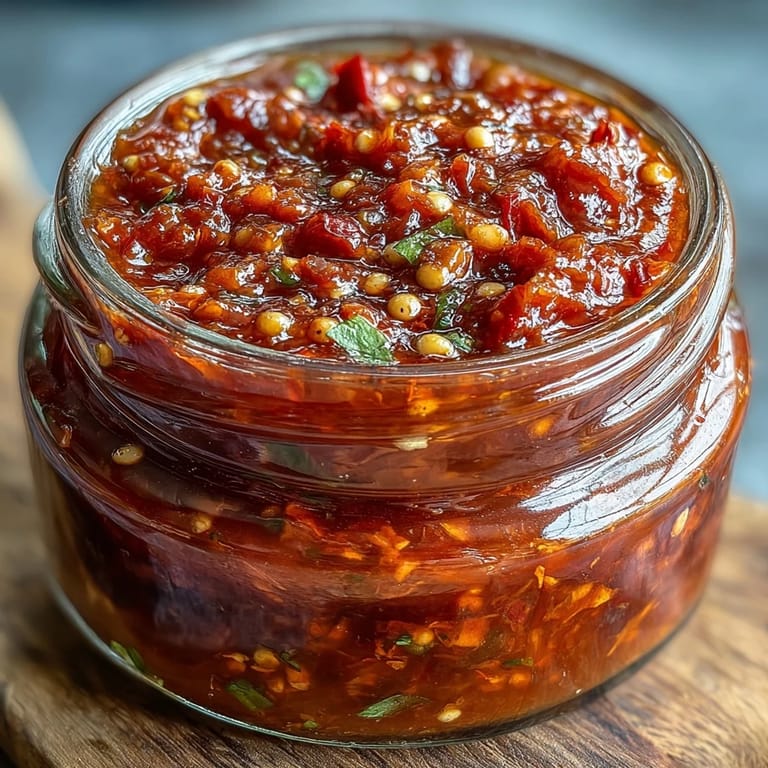 Save
Save Once you make this hot sauce, it’s hard to imagine Sunday brunch or noodle bowls without a homemade bottle nearby. If you’re lucky, you’ll still have some left to brag about before it all disappears.
Recipe FAQ
- → How long should the peppers ferment?
The jar is best left at room temperature for about seven days at 18–22°C (65–72°F). Check daily to keep vegetables submerged and skim any surface scum; flavor develops over that week and will continue to mellow in the fridge.
- → What salt ratio ensures safe fermentation?
Use about 15 g (1 tbsp) non-iodized salt per 500 ml (2 cups) of filtered water. That creates a reliable brine to encourage lacto-fermentation while keeping the vegetables crisp and flavorful.
- → Which peppers give the best balance of heat and flavor?
A mix of fresno, jalapeño or serrano with a red bell pepper adds both heat and sweetness. For more intensity, add a few habanero or Thai chilies; balance with carrot or bell pepper for body.
- → Can I add spices to the brine?
Yes. Whole spices like black peppercorns, coriander seeds or a bay leaf can be added to the jar or brine to infuse subtle aromatic notes during fermentation.
- → How should I finish and store the sauce?
After fermenting, blend the solids with some brine and 2 tbsp vinegar to stop fermentation and brighten flavor. Strain if you prefer smoothness, bottle in a sterilized jar and refrigerate — it keeps well for up to three months and continues to evolve.
- → How do I control the final texture and acidity?
Adjust thickness by adding more brine or vinegar when blending. Vinegar also raises acidity and stabilizes the sauce; use apple cider or rice vinegar for different flavor profiles.