 Save
Save My neighbor showed up at my door one Tuesday morning with three overripe bananas she couldn't use, and I suddenly found myself standing in the kitchen wondering what to do with them. That's when I remembered my grandmother's trick of turning sad bananas into something golden and warm, but I wanted to make it my own—so I grabbed the peanut butter jar, some oats, and chocolate chips, and this bread came together almost by accident. It turned out so good that I've been making it ever since, tweaking it each time until it became the version I'm sharing now.
I made this for a bake sale at my daughter's school, and watching kids' faces light up when they bit into those chocolate chips mixed with creamy peanut butter and soft banana was honestly better than any review I could get. One mom asked for the recipe right there, and I realized this wasn't just comfort food—it was something that made people genuinely happy.
Ingredients
- All-purpose flour (1 ½ cups): This is your structure, so don't skip it, but resist the urge to pack it down when measuring—spoon it in gently instead.
- Old-fashioned rolled oats (1 cup): They add heartiness and chewiness that makes this bread feel more substantial than typical banana bread, plus they're why people feel good eating it.
- Baking soda (1 tsp) and baking powder (½ tsp): This combination works magic with the bananas' natural moisture to create a tender crumb—don't swap them out or your texture will suffer.
- Salt (½ tsp) and cinnamon (1 tsp): Salt makes everything taste fuller, and cinnamon whispers warm spice notes without overpowering the peanut butter.
- Ripe bananas (3 medium, mashed): They should be almost too soft to eat raw—that's when they're sweetest and easiest to mash into submission.
- Creamy peanut butter (½ cup): Use the real stuff, not the oil-separated kind, because you want that peanut flavor to shine and hold the batter together gently.
- Light brown sugar (½ cup, packed): It adds moisture and a caramel-like depth that granulated sugar just can't match in quick breads.
- Neutral oil (¼ cup): This keeps the bread tender and moist for days, which butter alone won't do quite as well.
- Eggs (2 large): They're the binder that keeps everything from falling apart, so use room-temperature ones if you remember.
- Vanilla extract (1 tsp): Even a teaspoon makes a difference in how round and developed the flavor tastes.
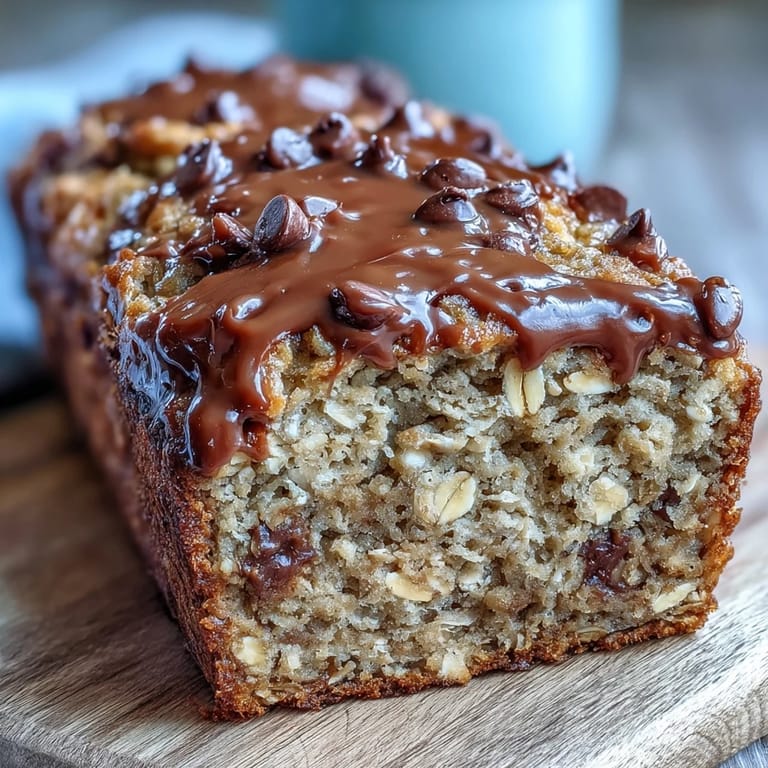
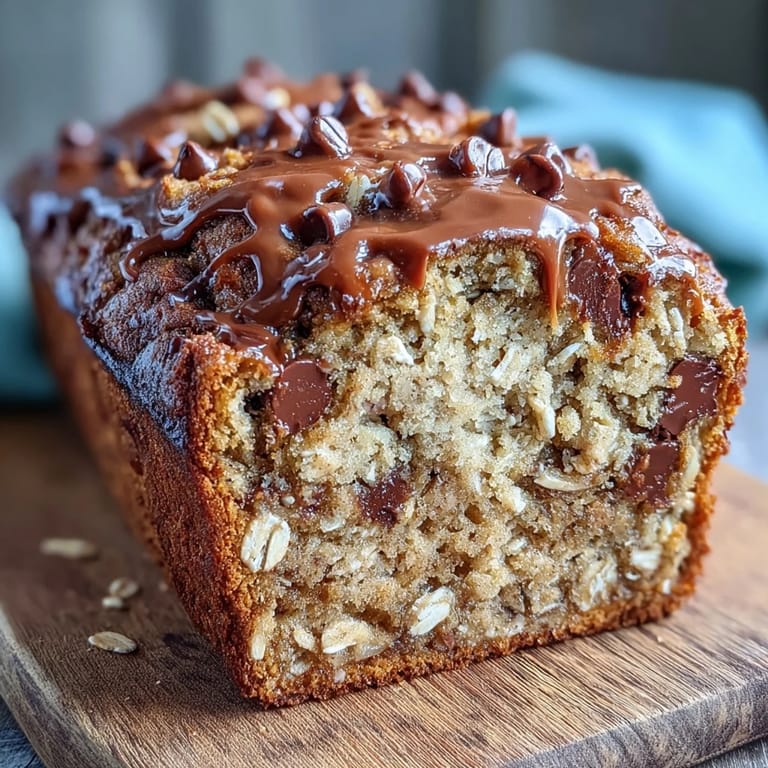
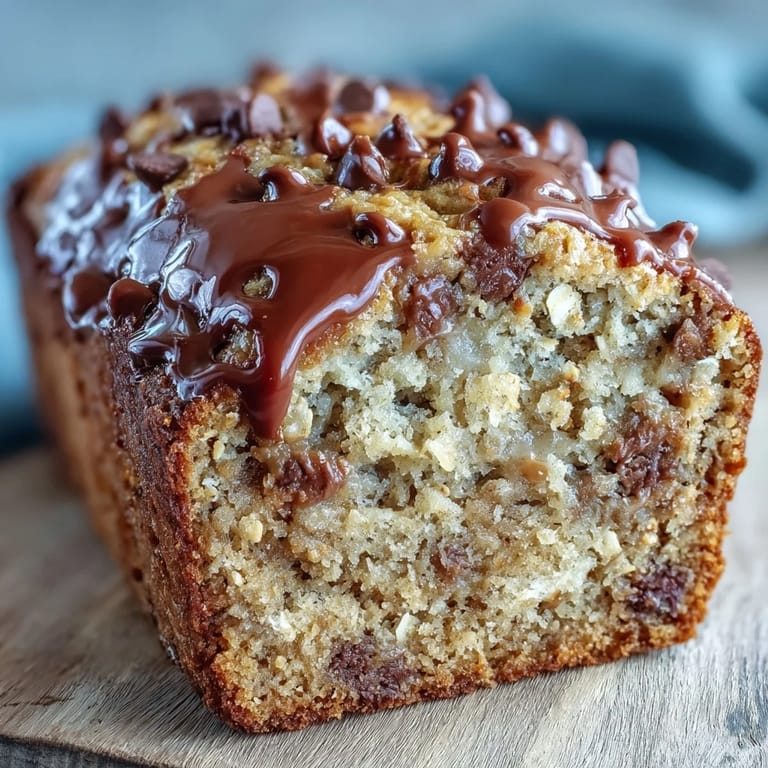
- Semisweet chocolate chips (¾ cup): These are non-negotiable—they melt slightly in the warm batter and create little pockets of joy throughout each slice.
- Roasted peanuts (¼ cup, optional): They add crunch and remind you what you're eating, but skip them if you want a smoother, more refined bite.
Tired of Takeout? 🥡
Get 10 meals you can make faster than delivery arrives. Seriously.
One email. No spam. Unsubscribe anytime.
Instructions
- Set the stage:
- Preheat your oven to 350°F and grease a 9x5-inch loaf pan, lining it with parchment paper so you can lift the cooled bread out cleanly. I learned this the hard way by losing half a loaf to a stubborn pan.
- Combine the dry team:
- In a large bowl, whisk together flour, oats, baking soda, baking powder, salt, and cinnamon until they're evenly distributed. This is where you catch any clumps before they mess with your texture.
- Build the wet mixture:
- In another bowl, combine mashed bananas, peanut butter, brown sugar, oil, eggs, and vanilla, whisking until the whole thing is smooth and no peanut butter streaks remain. This takes patience, but it's worth it.
- Bring them together gently:
- Pour the wet ingredients into the dry bowl and mix with a spatula using only enough strokes to combine—you're looking for a batter that just comes together, not a smooth, overmixed one. Overmixing makes the bread tough, and that's the opposite of what we want here.
- Fold in the goodies:
- Add chocolate chips and peanuts if using, folding them in with a few gentle turns of the spatula. I usually reserve a small handful to sprinkle on top for visual appeal.
- Ready for baking:
- Pour the batter into your prepared pan and smooth the top with a spatula, then scatter those reserved chips and nuts on the surface. This creates little bursts of texture on the first bite.
- Let it bake:
- Slide the pan into the oven for 50 to 55 minutes, watching for the top to turn golden and a toothpick inserted in the center to come out with a few moist crumbs clinging to it. A few crumbs are good—it means the bread will stay tender, not dry.
- Cool with patience:
- Let the loaf rest in the pan for 10 minutes while it firms up slightly, then transfer it to a wire rack to cool completely. Slicing too early will make it crumbly, so give it time.
 Save
Save The moment I realized this bread had become special was when my partner started making it without asking me how, just from watching me do it so many times. Now it sits on our counter every Sunday morning, and there's something grounding about that ritual.
Storage and Make-Ahead Magic
This bread is actually better on day two because the flavors meld and the crumb sets into something perfectly moist and cohesive. Wrap it tightly in plastic wrap or store it in an airtight container at room temperature for up to three days, or slice it first and freeze individual pieces for up to two months—pull one out in the morning and it'll be defrosted by snacktime.
Variations That Keep It Fresh
The beauty of this recipe is that it adapts to what you have on hand and what you're craving. I've swapped the peanut butter for almond butter when I wanted something lighter, skipped the chocolate chips in favor of white chocolate when I was feeling fancy, and even stirred in extra cinnamon when the weather turned cold. The structure stays solid no matter what you do to it, which is why I keep coming back to it.
Tips for Your Best Loaf
The secret to bread that tastes homemade and feels special is paying attention to small details—make sure your bananas are truly ripe, don't skip the vanilla, and fold those chocolate chips in with a light hand. These aren't rules that will make or break the recipe, but they're the difference between good bread and bread that makes people ask for seconds. Pay attention to your oven too, because every oven bakes differently, and you might need an extra minute or two on either side of that 55-minute mark.
- Swirl two extra tablespoons of peanut butter on top of the batter before baking for intense flavor pockets throughout.
- Room-temperature eggs mix more smoothly into the wet ingredients and create a more tender final crumb.
- If your chocolate chips are cold from the fridge, warm them up for five minutes so they soften and distribute more evenly through the batter.
 Save
Save This bread has become my answer to so many kitchen moments—when I need breakfast, when I want to bring something to a friend, when I'm craving something cozy but can't justify a full cake. It's the kind of recipe that sticks around because it works, tastes good, and makes everyone happy.
Recipe FAQ
- → Can I use natural peanut butter instead of creamy peanut butter?
Natural peanut butter works fine, though it may create a slightly denser texture due to the oil separation. Stir the peanut butter thoroughly before measuring to ensure consistent results. The bread will still be delicious and moist.
- → How do I know when the banana bread is fully baked?
Insert a toothpick into the center of the loaf after 50 minutes. It should come out with a few moist crumbs clinging to it—this indicates perfectly baked bread. If the toothpick comes out wet with batter, continue baking in 5-minute increments until done.
- → Can I make this banana bread without oats?
Yes, simply replace the cup of rolled oats with an additional cup of all-purpose flour. The texture will be slightly more cake-like and less hearty, but the flavor remains equally delicious. Keep all other measurements the same.
- → What's the best way to store leftover banana bread?
Wrap the cooled loaf tightly in plastic wrap or aluminum foil and store at room temperature for up to three days. For longer storage, slice and freeze individual portions in freezer-safe bags for up to two months. Thaw at room temperature before enjoying.
- → Can I substitute the chocolate chips with other mix-ins?
Absolutely! Try dried cranberries, chopped walnuts, white chocolate chunks, or butterscotch chips instead of semisweet chocolate. Each variation creates a unique flavor profile while maintaining the moist, tender crumb that makes this bread so appealing.
- → Should I use ripe bananas?
Yes, ripe bananas with brown spots are ideal. They're sweeter and softer, which enhances both flavor and moisture content. If your bananas aren't ripe enough, place them in a paper bag for 1-2 days to accelerate the process before mashing.