 Save
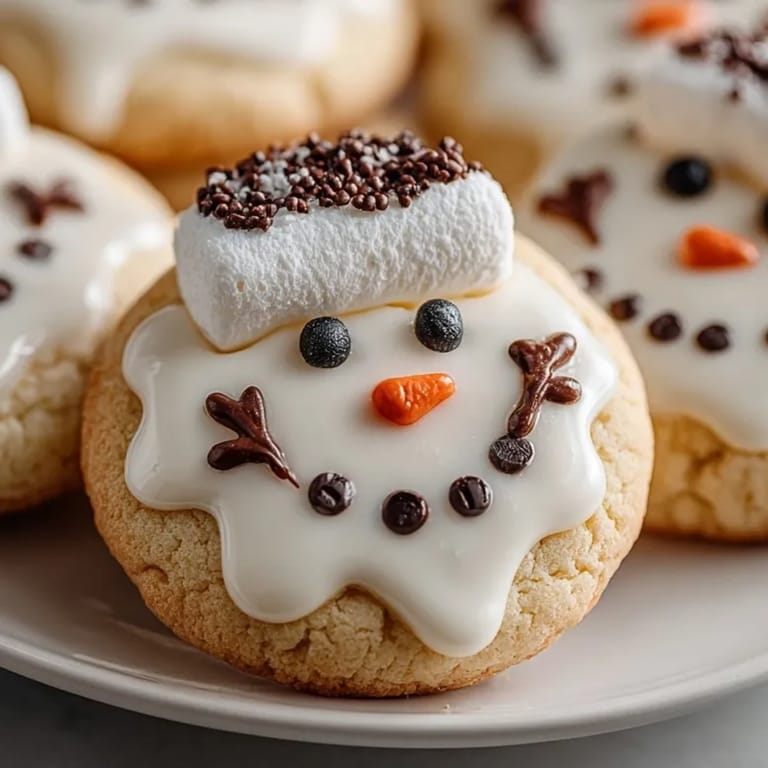
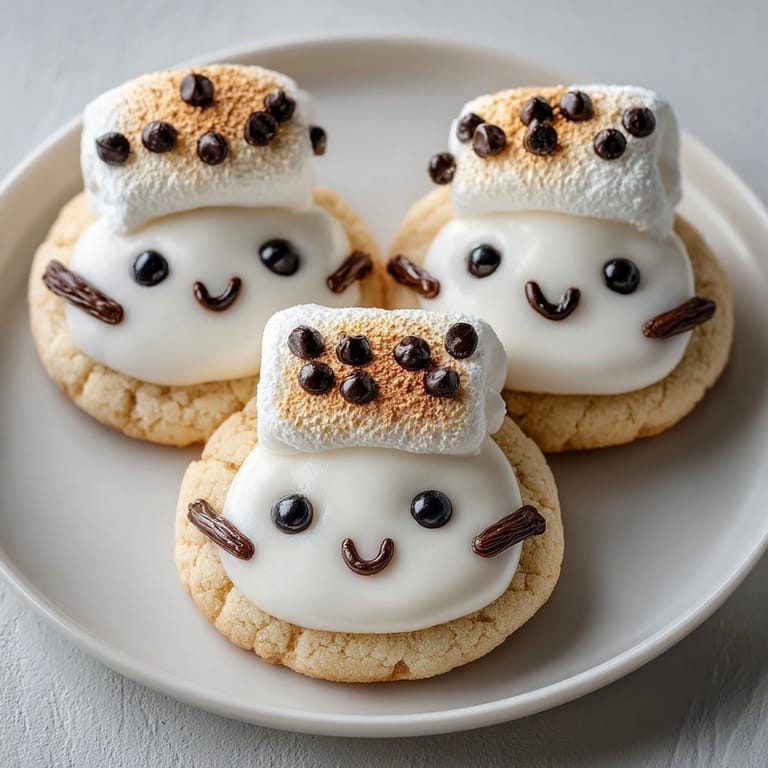
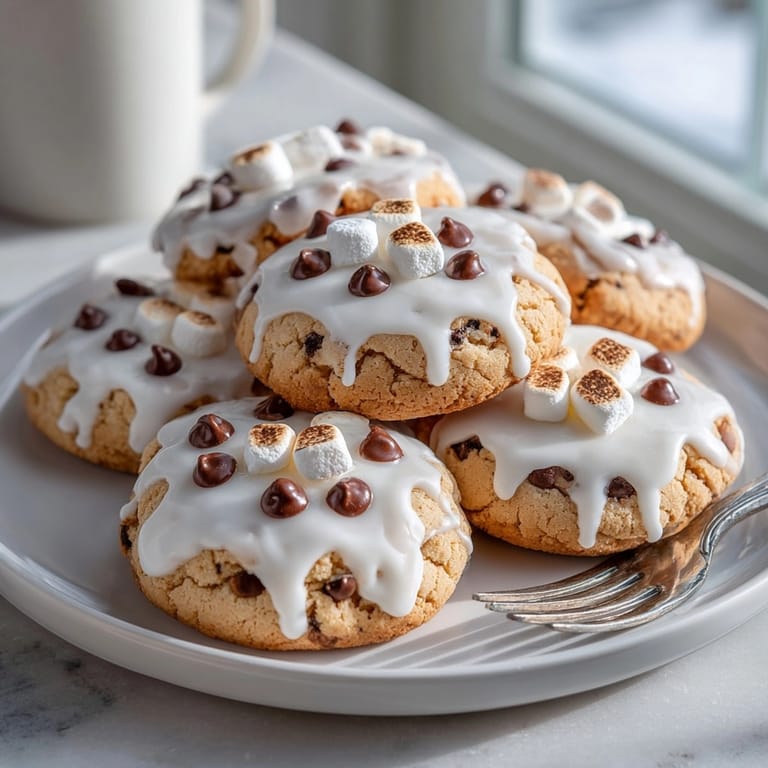
Save These adorable melted snowman sugar cookies bring winter magic to your dessert plate any time of year. The soft sugar cookies topped with glossy white icing create the perfect "puddle" for your marshmallow snowmen, complete with chocolate chip eyes and buttons. They're whimsical treats that make everyone smile, regardless of the weather outside.
I first made these during a holiday cookie exchange where I wanted something beyond traditional decorated cookies. The delighted gasps when guests saw these little melting snowmen made them an instant tradition in our home, and now my nieces request to make "melty snowmen" whenever they visit.
Ingredients
- All purpose flour: provides structure while keeping cookies tender when measured correctly using the spoon and level method
- Baking powder and baking soda: work together for the perfect rise without making cookies too cakey
- Fine salt: balances sweetness and enhances flavor use kosher salt if you prefer a slightly more pronounced taste
- Unsalted butter: creates richness choose high quality European style for extra flavor
- Granulated sugar: adds sweetness and helps create those slightly crisp edges
- Large egg: binds everything together room temperature eggs incorporate more evenly
- Vanilla extract: adds warmth and depth look for pure extract not imitation for best flavor
- Powdered sugar: creates the smooth glossy icing that resembles melted snow
- Milk: thins the icing to the perfect consistency whole milk works best for richness
- Large marshmallows: form the snowmen heads slightly warming them creates that perfect melted look
- Mini chocolate chips or candy pearls: create the perfect eyes and buttons dark chocolate provides nice contrast against the white
Tired of Takeout? 🥡
Get 10 meals you can make faster than delivery arrives. Seriously.
One email. No spam. Unsubscribe anytime.
Instructions
- Prepare the Dry Ingredients:
- Whisk together the flour, baking powder, baking soda, and salt in a medium bowl. This even distribution ensures your cookies rise properly and have consistent texture throughout. Make sure to whisk for at least 30 seconds to properly incorporate the leavening agents.
- Cream the Butter and Sugar:
- Beat the softened butter and granulated sugar in a stand mixer or with a hand mixer for 3 full minutes until light and fluffy. The mixture should look almost white and have increased in volume. This incorporates air into the dough for tender cookies.
- Add Wet Ingredients:
- Beat in the egg and vanilla extract until completely incorporated, about 1 minute. Scrape down the sides of the bowl to ensure everything mixes evenly. The mixture should look smooth and glossy.
- Combine Wet and Dry:
- Add the flour mixture to the butter mixture and mix on low speed just until combined. Stop mixing as soon as the flour disappears to avoid developing gluten which would make tough cookies. The dough will be soft but not sticky.
- Shape and Bake:
- Scoop 2 tablespoon portions of dough and roll into balls. Place on parchment lined baking sheets about 2 inches apart. Gently flatten each ball slightly with your palm. Bake in the preheated 350°F oven for 10 to 12 minutes until the edges are just set but centers still look slightly underdone.
- Make the Icing:
- While cookies cool completely, whisk together powdered sugar with milk, starting with 2 tablespoons and adding more as needed until you achieve a thick but pourable consistency. It should slowly drip from a spoon rather than pour in a thin stream.
- Create the Melted Effect:
- Spoon about 1 tablespoon of icing onto each completely cooled cookie, using the back of the spoon to guide it into an irregular puddle shape. Work with one cookie at a time for best results, as the icing will begin to set after a few minutes.
- Add Marshmallow Heads:
- Microwave marshmallows for 8 to 10 seconds just until they begin to puff slightly. Quickly place one marshmallow on each iced cookie while the icing is still wet, pressing gently so it adheres to the cookie.
- Decorate Your Snowmen:
- Press mini chocolate chips or candy pearls into the marshmallows to create eyes. Add additional chocolate pieces to the icing to create buttons. Work quickly as the marshmallows will firm up again. For extra detail, use a toothpick dipped in melted chocolate to draw arms or mouths.
 Save
Save The marshmallow is truly the magic ingredient in this recipe. I discovered by accident that warming them just slightly creates that perfect melted snowman head look without completely dissolving. My daughter now insists on making these every January when we need a little winter cheer but the real snow outside has turned gray and uninviting.
Make Ahead Magic
These cookies can be prepared in stages if you're short on time. The cookie dough can be made up to 3 days ahead and refrigerated. Simply bring it to room temperature before scooping and baking. You can also bake the cookies a day in advance and store them in an airtight container, then decorate just before serving for the freshest appearance.
Storage Solutions
Store decorated cookies in a single layer in an airtight container at room temperature for up to 4 days. Place parchment paper between layers if you must stack them. The marshmallows will gradually soften over time, enhancing the melted effect. Avoid refrigerating as this can dry out the cookies and cause the icing to weep.
Perfect Pairings
Serve these adorable cookies with hot chocolate topped with mini marshmallows for a complete winter treat experience. They also pair beautifully with a scoop of vanilla ice cream for a playful dessert. For adults, consider serving alongside peppermint schnapps coffee or vanilla chai tea for a sophisticated twist.
Seasonal Adaptations
Winter Holiday Version add crushed candy canes to the icing for a peppermint twist
Valentine's Day tint the icing pale pink and use heart shaped candies for buttons
Spring Edition use pastel colored marshmallows and add edible flower decorations
 Save
Save Success Stories
These cookies have been the highlight of many school bake sales in our community, often selling out first. Their visual appeal makes them irresistible, and teachers have even requested the recipe for classroom winter parties. One mom told me her daughter insisted on making these instead of a traditional birthday cake for her January celebration, creating a whole melted snowman scene that delighted all the party guests.
Recipe FAQ
- → How do I achieve the melted look for the icing?
Use a thick powdered sugar and milk mixture, then spoon generously over cooled cookies so it gently puddles without running off the edges.
- → What’s the ideal marshmallow technique?
Microwave marshmallows for just 10 seconds to soften and let them slump, then quickly set on the icing for the perfect snowman head shape.
- → How can I keep the cookies soft?
Underbake each batch slightly to retain a cake-like texture that holds the icing well and stays soft for days.
- → What can I use for snowman details?
Add faces and buttons with mini chocolate chips, candy pearls, or colored icing; try pretzel sticks or piped chocolate for arms.
- → Are these cookies suitable for kids to help with?
Absolutely! Children can decorate cookies with icing, place marshmallows, and add candy faces for a fun kitchen project.