Save
Save My friend Sarah's mom called me in a panic two days before Sarah's graduation—the bakery had overbooked and couldn't deliver the cake she'd ordered. We laughed nervously in my kitchen as flour dusted every surface, but something magical happened once we started mixing that buttery batter. By the time we carefully placed those edible gold sheets on the frosting, we weren't just making a cake anymore; we were creating a memory of doing something meaningful together under pressure.
What struck me most wasn't the stress of racing against the clock that graduation weekend—it was watching Sarah's face light up when she saw that diploma topper sitting perfectly centered on the cake. Her little brother tried to sneak a finger into the buttercream before we even got it to the dessert table, which felt like the truest test of whether it was actually good.
Ingredients
- All-purpose flour (2 ½ cups): The foundation of your cake's tender crumb—don't sift before measuring or you'll pack it too tight and end up with something dry.
- Baking powder (2 ½ tsp): This is what gives you that perfect rise without requiring you to separate eggs, which saves precious time.
- Salt (½ tsp): A tiny amount that somehow makes the vanilla flavor sing louder than you'd expect.
- Unsalted butter for cake (1 cup, softened): Room temperature is non-negotiable here—cold butter won't cream properly, and your cake will be dense instead of fluffy.
- Granulated sugar (2 cups): This is what creates that light, airy structure when beaten with the butter, so don't rush this step.
- Large eggs (4), room temperature: Cold eggs don't incorporate smoothly and can cause the batter to break, so pull them out of the fridge while you're prepping everything else.
- Vanilla extract (1 tbsp for cake): Use real vanilla if you can—it makes a noticeable difference in the final flavor profile.
- Whole milk, room temperature (1 cup): This keeps the batter from becoming too thick while you're alternating wet and dry ingredients.
- Unsalted butter for frosting (1 ½ cups, softened): Softer than soft—it should be almost pillowy when you start beating it.
- Powdered sugar, sifted (5 cups): Sifting prevents lumps that will show up as gritty streaks in your otherwise smooth frosting.
- Vanilla extract for frosting (2 tsp): This adds depth without making it taste artificial or one-dimensional.
- Milk or heavy cream (3–4 tbsp): Use just enough to reach the right consistency—too much and your frosting gets thin and won't hold swirls.
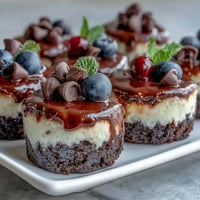
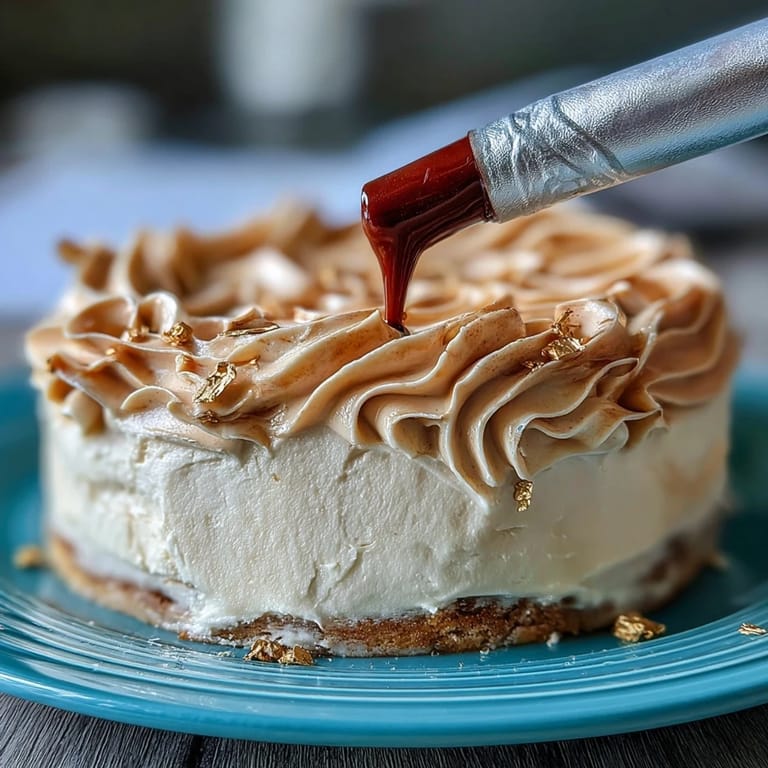
- Edible gold foil sheets: These are delicate treasures, so handle them with tweezers or completely dry hands to avoid fingerprints.
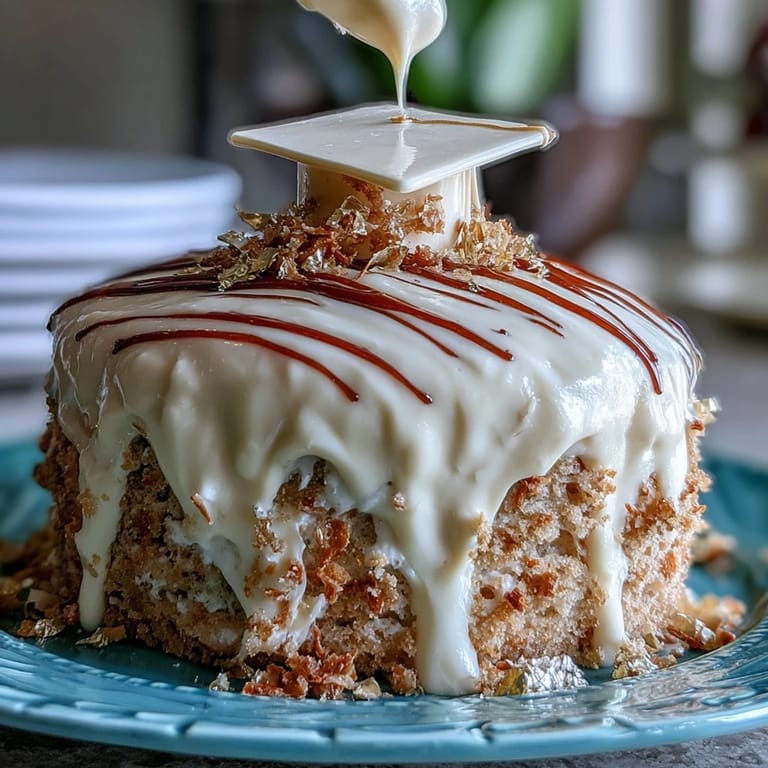
- Diploma-shaped cake topper: You can buy these pre-made or craft one from fondant, which lets you customize it with the school colors or name.
Tired of Takeout? 🥡
Get 10 meals you can make faster than delivery arrives. Seriously.
One email. No spam. Unsubscribe anytime.
Instructions
- Prepare your pans and preheat:
- Set your oven to 350°F and give it time to reach temperature while you grease two 9-inch round pans and line them with parchment paper. This prevents sticking and makes turning out the layers infinitely easier.
- Combine your dry ingredients:
- In a medium bowl, whisk together the flour, baking powder, and salt until they're evenly distributed. This aerates the flour and prevents lumps later.
- Cream butter and sugar:
- Beat softened butter and sugar together in a large bowl for about 3–4 minutes until the mixture is light, pale, and fluffy. You'll know it's ready when it looks almost like wet sand, not dense and grainy.
- Add eggs one at a time:
- Drop each egg in individually and beat well after each addition—this helps them incorporate fully into the butter mixture. If the batter looks slightly curdled, don't panic; it'll smooth out once you add the flour.
- Stir in vanilla:
- Add the vanilla extract and mix until just combined, letting the aroma fill your kitchen with a hint of what's coming.
- Alternate wet and dry:
- Add about a third of the flour mixture, then a third of the milk, alternating back and forth and ending with flour. Mix on low speed and don't overbeat—you want just enough stirring to bring everything together.
- Divide and smooth:
- Pour batter evenly into your prepared pans and smooth the tops gently with a spatula so they bake evenly.
- Bake until golden:
- Bake for 28–32 minutes until a toothpick inserted in the center comes out clean or with just a few moist crumbs. The cakes should be golden and springy when you lightly touch the top.
- Cool completely:
- Let cakes cool in their pans for 10 minutes, then gently turn them out onto wire racks to cool completely. This prevents them from continuing to bake and becoming dry.
- Prepare the buttercream:
- Beat softened butter on high speed for about 3 minutes until it's pale and creamy. Gradually add sifted powdered sugar, then vanilla, salt, and just enough milk to reach a smooth, spreadable consistency.
- Level and fill:
- If your cake layers are domed, trim the tops level so they stack evenly. Place one layer on your serving plate, spread a generous layer of buttercream on top, then carefully place the second layer.
- Apply crumb coat:
- Cover the entire cake with a thin layer of frosting, then refrigerate for 30 minutes. This seals in the crumbs so your final layer looks pristine.
- Final frosting:
- Apply a smooth, thick coat of buttercream over the entire cake, working slowly with an offset spatula. A cake turntable makes this easier, but a plate on your counter works fine too.
- Add gold foil accents:
- Using tweezers, carefully lift and apply edible gold foil sheets to your desired areas on the cake—perhaps around the top edge or scattered on the sides. The gold catches the light beautifully and feels celebratory.
- Top with diploma:
- Place your diploma topper at the center or slightly off to one side, add any sprinkles or confetti if you'd like, and give the whole thing a moment to set in the refrigerator.
- Serve at room temperature:
- Bring the cake out of the fridge about 15 minutes before serving so the flavors and textures are at their peak.
 Save
Save There's something about handing someone a cake you made with your own hands that shifts the whole meaning of celebration. When Sarah's family gathered around that evening, lit by the golden afternoon light streaming through the windows, the cake wasn't just dessert—it was proof that we'd shown up for her, that we cared enough to get flour everywhere and laugh at our mistakes.
Flavor Variations to Celebrate Their Journey
If vanilla feels too simple for the occasion, you have options that still feel elegant and not over-the-top. Add a teaspoon of almond extract to the batter for a subtle nod toward something more sophisticated, or use gel food coloring in the buttercream to match the graduate's school colors. The cake's foundation is sturdy enough to handle small flavor tweaks without falling apart, which is honestly a wonderful metaphor for starting a new chapter.
The Topper Makes the Moment
That little diploma-shaped decoration sitting on top of your cake does more work than you'd think. If you can't find a pre-made topper you love, rolling out fondant and cutting a diploma shape takes maybe 10 minutes, and you can use edible markers to write the graduate's name or their school colors. Some people make these toppers a week ahead so they have time to dry completely and become stable.
Gold Foil, Timing, and the Details That Matter
The gold foil is optional, but it's the element that transforms a nice homemade cake into something that looks professionally decorated. Apply it after your final frosting layer is done and smooth, and don't try to touch it again once it's placed—it's forgiving the first time but falls apart if you fuss with it. Think of the gold as confetti for the cake, something celebratory and just a little bit fancy for a moment that deserves it.
- Use completely dry hands or tweezers when handling edible gold foil, or it'll stick to moisture and tear.
- If you mess up a piece of gold foil, peel it off gently and try again with a fresh sheet—frosting underneath is forgiving.
- The gold catches light beautifully, so save this cake for an evening celebration where the lighting can show it off.
 Save
Save This cake is proof that you don't need a culinary degree to create something beautiful and delicious for someone you care about. Pour that vanilla-scented batter into those pans knowing you're about to make someone's graduation day just a little bit sweeter.
Recipe FAQ
- → How do I ensure the cake layers stay moist?
Use room temperature eggs and butter for a smooth batter and avoid overbaking to maintain moisture in each layer.
- → What is the best way to apply edible gold foil?
Handle gold foil gently with tweezers or dry hands to prevent tearing and place carefully on the chilled frosting for better adhesion.
- → Can I customize the frosting colors?
Yes, gel food coloring can be added to the buttercream to match any color scheme for a personalized touch.
- → What alternatives work for the diploma topper?
You can use fondant shaped and decorated with edible markers or a lightweight paper topper designed for food use.
- → How long should the cake chill before serving?
Chill the cake for at least 30 minutes after crumb coating and briefly after decorating to set the frosting firmly.